On This Page8 sections
Key Takeaways
- Stitch MCP Server connects Google's AI-powered interface design platform to MCP-compatible coding agents, including Claude Code, Cursor, Codex, and Google Antigravity.
- Google's remote MCP endpoint is
https://stitch.googleapis.com/mcp. Clients supporting authenticated HTTP MCP connections generally do not require a local proxy. - Common capabilities include listing projects and screens, generating new interfaces, editing existing screens, and producing design variations. The exact tool catalog should be discovered from the connected server.
- Stitch designs are not automatically production-ready applications. A coding agent still needs to implement data fetching, routing, accessibility, state, testing, and deployment.
- MCP access, model subscriptions, usage limits, and deployment costs are separate considerations. Verify current quotas in the relevant account.
What Is Stitch MCP Server?
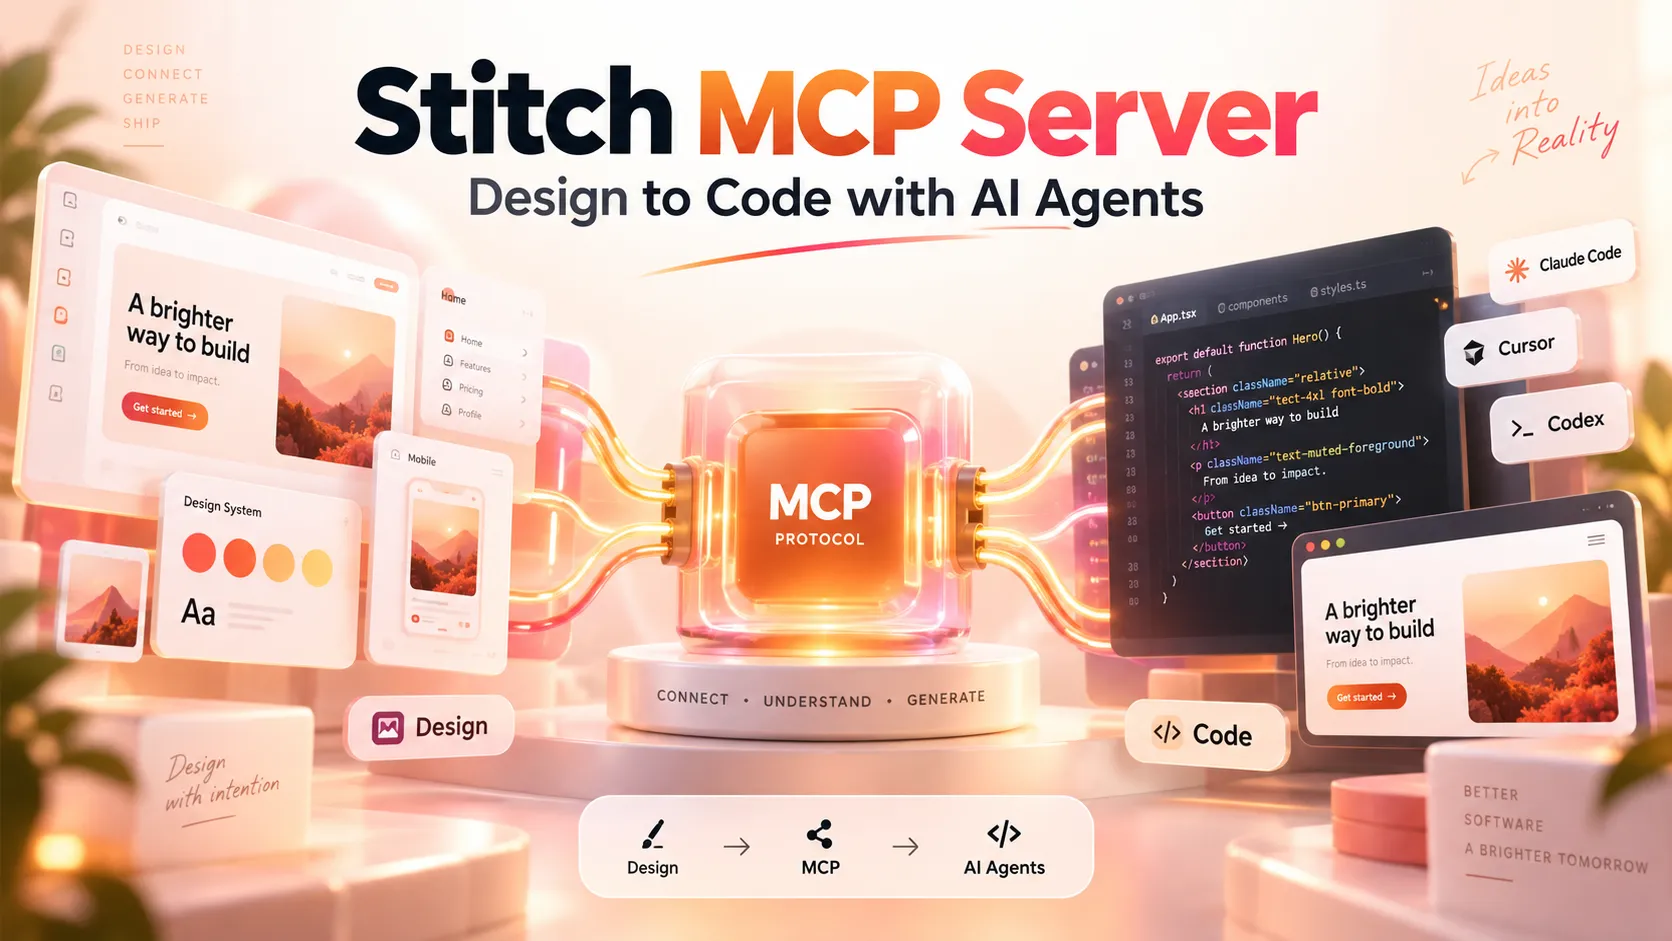
Stitch MCP Server is the Model Context Protocol (MCP) interface for Google Stitch, Google's AI-powered UI design tool. It makes Stitch's design-generation and project-inspection capabilities available to compatible AI coding assistants through structured tool calls.
Rather than manually describing a mockup to a coding assistant, a developer can instruct the assistant to retrieve an existing Stitch screen, inspect its layout, and build a corresponding interface in a React, Vue, or other frontend project. The design service and coding agent have distinct responsibilities: Stitch supplies visual design artifacts; the agent implements and validates the application.
Google introduced Stitch in 2025 and expanded its AI-native design workflow in 2026. The platform's direction includes natural-language design generation, iterative design collaboration, design-to-code handoff, and integration with agent-based development environments.
How Stitch MCP Works
MCP is an open protocol through which an AI application discovers tools provided by another service and invokes them with structured inputs. A Stitch integration ordinarily has four parts:
- MCP client: Claude Code, Cursor, Codex, Antigravity, Gemini CLI, or another compatible agent.
- Authentication: A Stitch API key or another authentication method supported by the chosen integration.
- MCP server: The Google-hosted endpoint, or a trusted local proxy that forwards requests.
- Stitch resources: Projects, screens, generated designs, screenshots, and relevant design metadata.
Developer prompt
      |
      v
Coding agent / MCP client
      |
      | authenticated tool request
      v
https://stitch.googleapis.com/mcp
      |
      v
Stitch projects and screens
      |
      | design artifacts and metadata
      v
Coding agent -> application code -> browser testing
Direct MCP, local proxy, or SDK?
| Option | Main advantage | Best use |
|---|---|---|
| Direct remote MCP | Minimal installation; connects to Google's hosted service | Modern agents with HTTP MCP support |
| Local MCP proxy | Can bridge transports and add workflow helpers | Clients that require stdio or custom tooling |
| Stitch SDK | Programmatic control in TypeScript or JavaScript | Custom automation and agent orchestration |
A community package called a Stitch MCP server may be a third-party wrapper, not the official Google-hosted endpoint. Review its source and dependencies before allowing it to process API keys or private projects.
Requirements and API Key Setup
Prepare a Google account with Stitch access, a compatible MCP client, network access to stitch.googleapis.com, and the appropriate credentials. Node.js is additionally useful for npm-based CLI tools and local proxies.
To obtain an API key:
- Visit Google Stitch and sign in.
- Open the account or settings area.
- Locate the API-key controls available to the account.
- Create a key and store it in a private credential manager.
- Configure that key in the chosen MCP client.
For shell-based setup, define the variable in the terminal session that launches the coding agent:
export STITCH_API_KEY='YOUR_STITCH_API_KEY'A Stitch credential should not be confused with a generic Gemini API key. Use the authentication method required by the Stitch integration.
Important: Examples with placeholder credentials are intended for local configuration. Never commit a real key to a public repository, screenshot it in a tutorial, or include it in a frontend bundle.
Install Stitch MCP Server in Claude Code
Claude Code supports remote MCP connections. For an HTTP connection using the X-Goog-Api-Key header, run:
claude mcp add --transport http --scope user stitch https://stitch.googleapis.com/mcp \
  --header "X-Goog-Api-Key: $STITCH_API_KEY"
Inspect the registered connection:
claude mcp listInside Claude Code, the /mcp command can help inspect configured MCP servers and tool availability.
Start with a read-only verification prompt:
Use the Stitch MCP connection to list projects
accessible to my account. Return their names and
identifiers. Do not modify or generate any screens.
If the client reports an authentication error, verify that the variable was defined in the same shell environment and that the configured header contains the intended key. Also confirm that credentials are being stored in an appropriately protected user-level configuration.
Optional: a local stdio bridge
A community-maintained option is @_davideast/stitch-mcp. Its setup flow is documented through:
npx @_davideast/stitch-mcp initA bridge can help with transport compatibility and supplementary tooling, but it introduces additional package code into the trust boundary. Prefer a direct connection where it works reliably.
Configure Stitch MCP in Cursor
Cursor supports MCP configuration through its settings and JSON configuration files. A representative user-level configuration path is:
~/.cursor/mcp.jsonConfigure the server with an authenticated HTTP URL:
{
  "mcpServers": {
    "stitch": {
      "url": "https://stitch.googleapis.com/mcp",
      "headers": {
        "X-Goog-Api-Key": "YOUR_STITCH_API_KEY"
      }
    }
  }
}
This example intentionally uses a placeholder. When available, prefer Cursor's supported environment-variable or secret-management mechanism rather than persisting the real key in project files.
Open Cursor's MCP settings, confirm that Stitch is connected, and inspect the tools exposed to Agent mode. Then request a list of accessible Stitch projects before asking the agent to generate or edit designs.
For an existing application, use a constrained prompt:
Inspect my selected Stitch screen. Identify its
design tokens, component structure, and responsive
layout. Suggest a React implementation plan that
uses the conventions already present in this repo.
Do not edit files until the plan is reviewed.
Configure Stitch MCP in Codex CLI
Codex supports configurable MCP servers and environment-sourced HTTP headers. Edit the user configuration file:
~/.codex/config.tomlAdd:
[mcp_servers.stitch]
url = "https://stitch.googleapis.com/mcp"
tool_timeout_sec = 300

[mcp_servers.stitch.env_http_headers]
X-Goog-Api-Key = "STITCH_API_KEY"
The env_http_headers mapping reads the value of the STITCH_API_KEY environment variable rather than sending the literal variable name. The environment variable must be available when Codex starts.
Check the registration:
codex mcp listIn an interactive Codex session, use /mcp to inspect connectivity and tools. A longer timeout can be useful for slow screen-generation operations, but it does not override server-side quota, permission, or processing limits.
See the Codex MCP documentation for current configuration behavior.
Stitch MCP with Google Antigravity and Gemini CLI
Google documents a design-to-code workflow in its Stitch and Antigravity codelab. The basic sequence is to create a Stitch design, generate an API key, add Stitch in Antigravity's MCP management interface, authenticate, inspect available projects, and ask the agent to implement an approved screen.
For Gemini CLI, Google's Stitch extension repository documents extension-based integration:
gemini extensions install https://github.com/gemini-cli-extensions/stitch --auto-updateComplete the extension's documented authentication steps, then inspect exposed MCP tools in Gemini CLI. Client commands and available tools can evolve; use the live interface rather than relying on old screenshots or copied tool schemas.
Using the Google Stitch CLI
The @google/stitch npm package offers terminal commands and an MCP entry point. This can be useful for developers who want both agent integration and direct CLI workflows.
npm install -g @google/stitch
stitch login
stitch status
Documented command patterns include:
stitch mcp install
stitch mcp start
stitch find projects --limit 10 --json
Review the installed package's current help output and Node.js requirements before scripting against it. CLI authentication and Stitch API-key requirements may differ by operation.
Stitch MCP Tools and Capabilities
Stitch's documented SDK and MCP ecosystem includes operations such as:
| Tool or operation | Purpose | Example |
|---|---|---|
list_projects | Discover accessible projects | Find the relevant dashboard |
get_project | Read project information | Inspect project metadata |
create_project | Start a new project | Create a product design workspace |
list_screens | Enumerate screens | Identify onboarding and settings views |
get_screen | Retrieve screen details | Obtain a selected screen's assets |
generate_screen_from_text | Generate a new interface | Create an analytics dashboard |
edit_screens | Revise existing designs | Adjust layout or visual hierarchy |
generate_variants | Produce alternative directions | Compare multiple design concepts |
Do not assume the same tool list in every installation. A third-party proxy may add helpers not exposed by the native Google server, and server capabilities may change. Inspect listTools or the client's MCP tool inspector for the authoritative current schema.
Project IDs and screen IDs
Project IDs, screen IDs, and resource names may have different expected formats. A resource identifier might resemble:
projects/123456789
projects/123456789/screens/abc123
These are illustrative values. Always reuse identifiers returned by the tool rather than inventing or manually transforming them. Passing a screen-instance identifier to an operation requiring a screen identifier can cause NOT_FOUND or validation errors.
For long-running workflows, save essential generated metadata and approved asset references. Some retrieval operations do not necessarily reproduce all fields returned by an earlier generation operation; see Stitch SDK issue #138.
Use the Stitch SDK for Custom Automation
Google's Stitch SDK provides JavaScript and TypeScript access without requiring an interactive MCP client.
Install the package:
npm install @google/stitch-sdkA minimal discovery script is:
import { stitch } from '@google/stitch-sdk';

async function main() {
  const { tools } = await stitch.listTools();

  for (const tool of tools) {
    console.log(tool.name);
  }

  const projects = await stitch.projects();

  for (const project of projects) {
    console.log(project.id);
  }
}

main().catch(console.error);
Run the script with STITCH_API_KEY available in its environment. Read the installed SDK's API definitions before adapting the example for generation, editing, or batch workflows.
Use MCP when an AI agent needs tools. Use the SDK when application code needs direct control over calls, retries, logging, and structured results.
A Reliable Stitch-to-React Workflow
A design-to-code handoff benefits from explicit checkpoints instead of one unrestricted prompt.
- Write the requirements. Name the audience, platform, key screens, layout constraints, and interaction goals.
- Generate a reference design. Use Stitch to explore a small number of coherent directions.
- Select an approved screen. Avoid implementing several competing variants at once.
- Capture design tokens. Record typography, colors, spacing, radius, layout, and component rules.
- Retrieve current assets. Preserve relevant HTML, screenshot references, and design metadata.
- Plan components. Map the screen to reusable layout, navigation, cards, forms, and chart components.
- Implement the UI. Use the existing project's conventions instead of blindly copying generated markup.
- Add real behavior. Connect routing, APIs, data states, forms, security, and accessibility.
- Verify visually. Compare screenshots at representative desktop and mobile viewport widths.
- Test and deploy. Check keyboard navigation, error states, responsiveness, performance, and application tests.
A visually similar screen is not necessarily a functioning product. Treat Stitch as a design accelerator and coding agents as implementation assistants, with human review at consequential checkpoints.
Better Prompts for Stitch MCP
Specific prompts outperform vague instructions because they reduce ambiguity in visual hierarchy, screen content, and implementation intent.
Prompt: analytics dashboard
Create a desktop-first SaaS analytics dashboard.
Audience: founders and product managers.

Include:
- Left sidebar with clear active navigation
- Revenue, active users, churn, and conversion KPIs
- Main revenue trend chart
- Acquisition source breakdown
- Recent transactions table
- Date-range controls

Design:
- Light neutral background
- Strong typography and whitespace
- Consistent 8px spacing rhythm
- Restrained accent palette
- Readable contrast and realistic sample data

Include responsive layout behavior and sensible
empty and loading states.
Prompt: design-to-code handoff
Use Stitch MCP to inspect the approved screen.
First document the visual tokens and component tree.
Then implement it in React and Tailwind CSS.

Keep existing repository conventions. Use semantic
HTML and keyboard-accessible controls. Do not add
unnecessary dependencies or expose API credentials.
Run the application and compare screenshots against
the Stitch reference before reporting completion.
Prompt: safe design modification
Locate the selected Stitch project and target screen.
Summarize its current structure before editing.
Create a variant with more prominent primary actions
and improved mobile information hierarchy. Preserve
the original version for comparison.
Separating inspection, generation, modification, implementation, and verification makes it easier to audit results and avoid accidental duplication.
DESIGN.md, Design Systems, and Agent Skills
DESIGN.md is a portable Markdown description of design rules that can guide agents across screens and code changes. A useful version documents colors, typography, spacing, component conventions, navigation patterns, responsiveness, and accessibility principles.
The Stitch Skills repository contains reusable agent-oriented workflows. An Agent Skill provides task instructions; an MCP server supplies callable tools. A skill does not replace an authenticated MCP connection.
For multi-page products, consistent design rules often create more value than generating additional disconnected mockups. Require the coding agent to check new components against the approved design document before implementation.
Stitch MCP vs Figma MCP vs Coding Without Design MCP
| Dimension | Stitch MCP | Figma-oriented MCP | Coding agent alone |
|---|---|---|---|
| Best starting point | Early-stage UI concepts | Established design files and systems | Existing application code |
| Main strength | Design generation and visual iteration | Handoff from an existing design workflow | Functionality and repository-aware coding |
| Design context | Stitch projects and screens | Figma resources exposed by its server | Repository styles and written instructions |
| Production code | Requires an implementation workflow | Requires an implementation workflow | Core focus |
| Ideal use | Prototype-to-code exploration | Team design-to-development handoff | Building and maintaining application behavior |
Stitch is especially attractive when a visual direction has not been established. Figma integrations are often a better fit for teams already maintaining mature component libraries and approved product designs. These approaches can complement each other rather than competing in every project.
Pricing, Free Access, and Quotas
Google's Gemini CLI Stitch extension documents free Stitch MCP access. That does not guarantee unlimited generation or eliminate costs associated with connected coding agents.
| Component | Cost consideration |
|---|---|
| Stitch MCP | Documented as free in the official extension guidance |
| Stitch generation | Subject to current account-specific quotas and availability |
| Claude Code, Cursor, or other agents | Separate subscription or usage terms may apply |
| Cloud infrastructure | Hosting, APIs, storage, and deployment are separate |
| Third-party MCP bridges | Inspect any package or provider-specific pricing |
Do not rely on historical claims about fixed monthly screen quotas. Limits can change, and accounts may show different allowances. Check the current Stitch interface and relevant product documentation before committing to high-volume automation.
Troubleshooting Stitch MCP Errors
| Problem | Likely cause | Fix |
|---|---|---|
401 / AUTH_FAILED | Missing or invalid credentials | Verify the Stitch key and request header |
403 / PERMISSION_DENIED | Inadequate permissions or access | Check account, project, and policy restrictions |
NOT_FOUND | Incorrect project or screen ID | List resources and reuse exact identifiers |
VALIDATION_ERROR | Wrong tool parameters | Inspect the current MCP tool schema |
RATE_LIMITED | Quota reached | Review usage and reduce requests |
| Server missing | Configuration not loaded | Check config location and refresh the client |
| Generation timeout | Slow remote operation | Increase a supported timeout and inspect project state |
| Missing assets | Expired URL or incomplete metadata | Retrieve current screen details and refresh links |
Prevent duplicate generation after timeouts
A generation request can continue on the server even if the client stops waiting. Before retrying, list the project's screens and verify whether the initial request completed. Blind retries may create duplicate designs or consume quota.
Diagnose authentication separately from generation
Test a read-only operation such as listing projects before requesting a new screen. This isolates transport and credential problems from generation, quota, and content issues.
Preserve generated artifacts
Signed asset links may expire, and later screen retrieval may not include the complete initial generation response. Download necessary authorized assets into the workspace and keep a record of screen IDs, prompt versions, and approved design decisions.
Security and Privacy Best Practices
- Keep credentials out of source control. Use supported secret facilities, private client configuration, and environment variables.
- Grant limited access. Use only the projects and operations necessary for the task.
- Review local proxies. Third-party bridges can access requests, responses, and potentially API credentials.
- Separate permissions. Reading a screen should not automatically authorize destructive design changes or production deployment.
- Inspect generated markup. Check external resources, dependencies, forms, accessibility, and network requests.
- Protect confidential information. Review applicable data-processing terms before submitting proprietary designs or sensitive content.
- Retain an audit trail. Record which designs were approved and which code changes implemented them.
A practical policy is to begin with read-only MCP inspection, require approval for generation or editing, and keep deployment behind normal repository review and testing.
Frequently Asked Questions
Is Stitch MCP Server official?
Google operates the remote Stitch MCP endpoint and publishes relevant integration documentation. Individual GitHub packages named after Stitch may be third-party wrappers; inspect their maintainers and support disclaimers.
Can Stitch MCP work with Claude Code, Cursor, and Codex?
Yes, through compatible MCP configurations. Authentication headers, configuration file formats, and tool approval settings differ across clients.
Does Stitch MCP automatically generate production-ready React code?
No. Stitch generates visual design context and frontend artifacts. A coding agent can turn those into React components, but real application behavior, accessibility, security, and testing still require engineering work.
Must a local MCP proxy be installed?
No. A client that supports the required remote HTTP MCP transport and authentication can connect directly. A local proxy is optional for compatibility or extra helper features.
What is the difference between Stitch MCP and the Stitch SDK?
MCP allows AI agents to discover and invoke design tools. The SDK gives developers programmatic access for custom scripts and applications.
Is Stitch MCP unlimited and free?
Free MCP access has been documented, but generation allowances are subject to current service policies. Connected coding tools and deployment infrastructure can have separate charges.
Why use DESIGN.md?
It gives the implementation agent a persistent visual specification, reducing inconsistent colors, spacing, typography, and component conventions across pages.
Conclusion
Stitch MCP Server connects AI-powered interface design to real development workflows. Its main value is the ability to generate, inspect, and refine visual designs while allowing an MCP-compatible coding agent to implement the approved result inside a repository.
For most developers, direct access to Google's hosted MCP endpoint is the simplest starting point. A trusted proxy can help with compatibility, while the CLI and SDK offer additional automation options.
To begin, create a project in Google Stitch, follow the Stitch MCP setup guide, connect the relevant coding assistant, and complete one small design-to-code workflow with explicit review and browser verification before scaling up.
Continue Reading
More articles connected to the same themes, protocols, and tools.


Referenced Tools
Browse entries that are adjacent to the topics covered in this article.